|
Webminとは・・・ネットワークやサーバ、システムやハードウェアなどの環境設定を、ブラウザから行うことができるものです。コマンドでポチポチ打ち込んだり、バカデカイテキストファイルをいじったりすることに慣れていないWindowsユーザからすれば、非常にありがた設定ツールと言えるかもしれません。
しかしまぁ困ったことに私が使ったVineLinux3.1にはインストールされてませんでした。ァゥァゥァー |
|
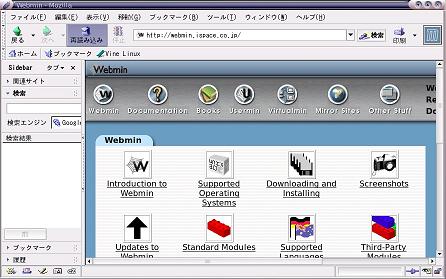 |
まずはWebminをダウンロードするところからですね。ちなみに
apt-get コマンドは使えませんでした。サポート外っぽいですね。なので手動でダウンロードです。まずはサイトにアクセス。 |
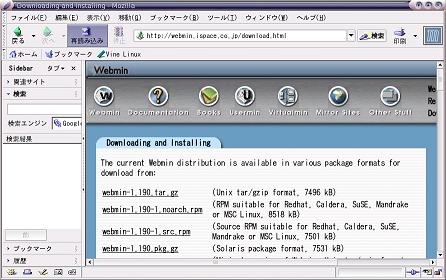 |
「Downloading and Installing」ってとこから左のようなページにいけますので、一番上の「webmin-1.190.tar.gz」をダウンロードします。ダウンロード先はどこでもいいですが、とりあえず「/usr/local/bin/」にしました。 |
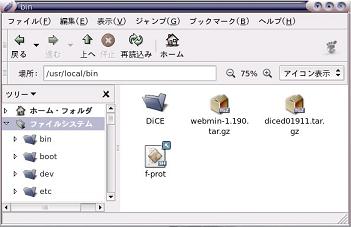 |
「/usr/local/bin/」ディレクトリに「webmin-1.190.tar.gz」というファイルがあることを確認します。 |
|
[root@cere900 root]# cd /usr/local/bin [root@cere900 bin]# tar zxvf webmin-1.190.tar.gz |
展開コマンドです。「解凍」って言った方がいいんですかね。 |
| [root@cere900 root]#
cd /usr/local/bin/webmin-1.190 [root@cere900 webmin-1.190]# ./setup.sh *********************************************************************** * Welcome to the Webmin setup script, version 1.190 * *********************************************************************** Webmin is a web-based interface that allows Unix-like operating systems and common Unix services to be easily administered. Installing Webmin in /usr/local/bin/webmin-1.190 ... *********************************************************************** Webmin uses separate directories for configuration files and log files. Unless you want to run multiple versions of Webmin at the same time you can just accept the defaults. Config file directory [/etc/webmin]: Log file directory [/var/webmin]: *********************************************************************** Webmin is written entirely in Perl. Please enter the full path to the Perl 5 interpreter on your system. Full path to perl (default /usr/bin/perl): Testing Perl ... Perl seems to be installed ok *********************************************************************** For Webmin to work properly, it needs to know which operating system type and version you are running. Please select your system type by entering the number next to it from the list below --------------------------------------------------------------------------- 1) Sun Solaris 2) Caldera OpenLinux eS 3) Caldera OpenLinux 4) Redhat Linux 5) Slackware Linux 6) Debian Linux 7) SuSE Linux 8) United Linux 9) Corel Linux 10) TurboLinux 11) Cobalt Linux 12) Mandrake Linux 13) Mandrake Linux Corpo 14) Delix DLD Linux 15) Conectiva Linux 16) ThizLinux Desktop 17) ThizServer 18) MSC Linux 19) MkLinux 20) LinuxPPC 21) XLinux 22) LinuxPL 23) Trustix 24) Trustix SE 25) Cendio LBS Linux 26) Ute Linux 27) Lanthan Linux 28) Yellow Dog Linux 29) Corvus Latinux 30) Immunix Linux 31) Gentoo Linux 32) Lycoris Desktop/LX 33) Secure Linux 34) OpenNA Linux 35) White Dwarf Linux 36) SoL Linux 37) Coherent Technology 38) Playstation Linux 39) TinySofa Linux 40) StartCom Linux 41) Yoper Linux 42) Generic Linux 43) FreeBSD 44) OpenBSD 45) NetBSD 46) BSDI 47) DragonFly BSD 48) HP/UX 49) SGI Irix 50) DEC/Compaq OSF/1 51) IBM AIX 52) SCO UnixWare 53) SCO OpenServer 54) Mac OS X / OS X Serv 55) Darwin 56) OpenDarwin 57) Cygwin 58) Sun Java Desktop Sys --------------------------------------------------------------------------- Operating system: 4 Please choose which version of Redhat Linux you are running, by entering the number next to it from the list below --------------------------------------------------------------------------- 1) Redhat Linux 4.0 2) Redhat Linux 4.1 3) Redhat Linux 4.2 4) Redhat Linux 5.0 5) Redhat Linux 5.1 6) Redhat Linux 5.2 7) Redhat Linux 6.0 8) Redhat Linux 6.1 9) Redhat Linux 6.2 10) Redhat Linux 7.0 11) Redhat Linux 7.1 12) Redhat Linux 7.2 13) Redhat Linux 7.3 14) Redhat Linux 8.0 15) Redhat Linux 9.0 16) Redhat Linux Fedora 1 17) Redhat Linux Fedora 2 18) Redhat Linux Fedora 3 19) Redhat Linux Fedora 4 20) Redhat Linux 2.1AS 21) Redhat Linux 2.1ES 22) Redhat Linux 2.1WS 23) Redhat Linux 3.0AS 24) Redhat Linux 3.0ES 25) Redhat Linux 3.0WS 26) Redhat Linux Desktop 3 27) Redhat Linux 4.0ES 28) Redhat Linux 4.0AS 29) Redhat Linux 4.0WS --------------------------------------------------------------------------- Version: 14 Operating system name: Redhat Linux Operating system version: 8.0 *********************************************************************** Webmin uses its own password protected web server to provide access to the administration programs. The setup script needs to know : - What port to run the web server on. There must not be another web server already using this port. - The login name required to access the web server. - The password required to access the web server. - If the webserver should use SSL (if your system supports it). - Whether to start webmin at boot time. Web server port (default 10000): Login name (default admin): root Login password: Password again: The Perl SSLeay library is not installed. SSL not available. Start Webmin at boot time (y/n): y *********************************************************************** Creating web server config files.. ..done Creating access control file.. ..done Inserting path to perl into scripts.. ..done Creating start and stop scripts.. ..done Copying config files.. ..done Configuring Webmin to start at boot time.. Created init script /etc/rc.d/init.d/webmin ..done Creating uninstall script /etc/webmin/uninstall.sh .. ..done Changing ownership and permissions .. ..done Running postinstall scripts .. ..done Attempting to start Webmin mini web server.. Starting Webmin server in /usr/local/bin/webmin-1.190 ..done *********************************************************************** Webmin has been installed and started successfully. Use your web browser to go to http://cere900:10000/ and login with the name and password you entered previously. [root@cere900 webmin-1.190]# |
そしたらセットアップ作業に入ります。
cd /usr/local/bin/webmin-1.190 で、展開したディレクトリに移動して、 ./setup.sh で、セットアップスタートです。 ほとんど初期設定のままですね。まず最初は「設定ファイル」と「ログファイル」の出力先を聞かれますが、初期設定のままで問題ないので「Enter」2回。 次に、Webminが動作するためには「Perl」が必要であり、そのPerlの場所を聞いてきますので、まぁそのまま「Enter」。VineLinux3.1ではデフォルトの「/usr/bin/perl」にありますから。 んでまぁWebminを使うLinuxの種類を聞いてきますが、残念ながらVineLinuxはこのリストの中にはありません。うげぇ。 まぁ無いなら無いでなんでもいいやってことで、適当に選択しときます。 ここでは「Redhat Linux 8.0」を選択しちゃいました。うそっぱちだけど。気にしなーい。 そしたら次はアカウントです。Webmin自体にログインする時のアカウント。ユーザ名はデフォルトでは「admin」ですが、なんか使い慣れてる「root」にしました。 で、パスワードですが、入力しても「*」が表示されたり、「パスワード」自体が表示されることはないです。まるで何も入力してないような状態です。カーソルが移動しないのです。でも実際には入力したことになってますので、適当に入力してEnter押します。 もう一度パスワード入れるように言ってくるので、パスワード入れてEnter押します。 そしたら次はSSLの暗号通信機能を使うかどうか聞いてきます。まぁ外部からアクセスすることは無い(少なくとも私は)ので、そこまでセキュリティを上げる必要があるのかどうか微妙なとこですが、一応念のため「y」としてEnter。 あとは自動で設定してくれます。 設定が終わると、 http://cere900:10000/ でアクセスしてみそってなります。実際やってみましょう。もちろん普通のブラウザからです。 |
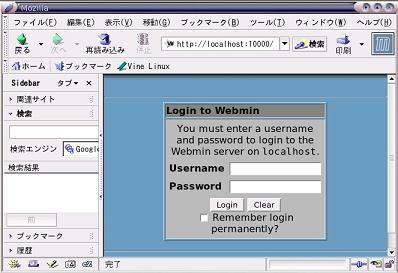 |
こんな感じになりますね。アクセスするときのURLですが、別に「サーバ機」を表すアドレスならなんでもいいと思います。ただ、ポート番号10000さえ指定すれば。
で、ユーザ名とパスワードを入力します。 |
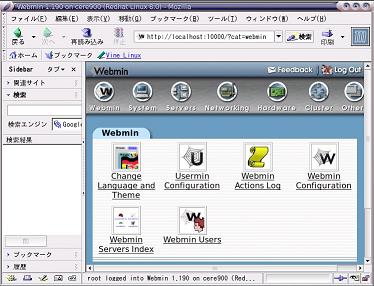 |
この画面が入り口になります。色々ありますが、とりあえず英語じゃわかりにくいんで、日本語にしちゃいます。
「Change Language and Theme」をクリックします。ここで使用言語(表示される言語)と使用テーマ(外観)を変更できます。 |
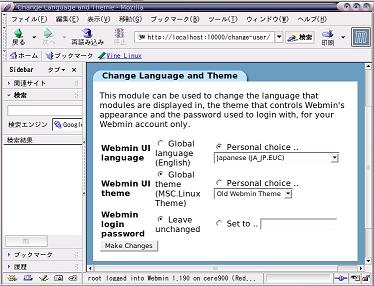 |
で、初期状態では「Global language(English)」が選択されてますが、これを「Personal
Choice」を選択して選択ボックスから「Japanese(JA_JP.EUC)」を選択します。
あとはどうでもいいのでそのまま。「Make Change」ボタンを押します。 |
 |
んで元のページに戻ればこのとうり。 |
| 楽な設定ツールってのはいいんですが、VineLinuxに始めから入ってないってことはこれに代わるようなツールがあるってことでしょうか。気になります。 | |
